5 Hand Lettering Styles For Your Bullet Journal - the paper kind
By A Mystery Man Writer
Last updated 12 May 2024

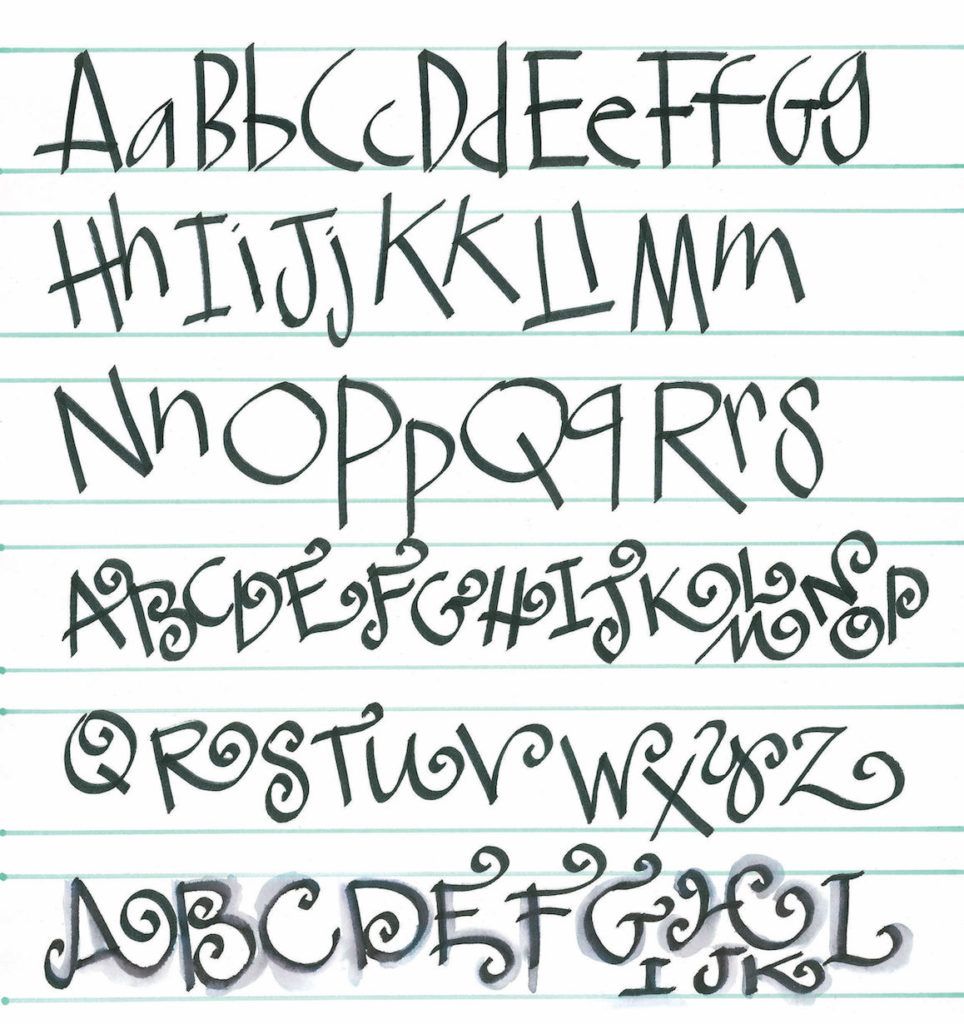
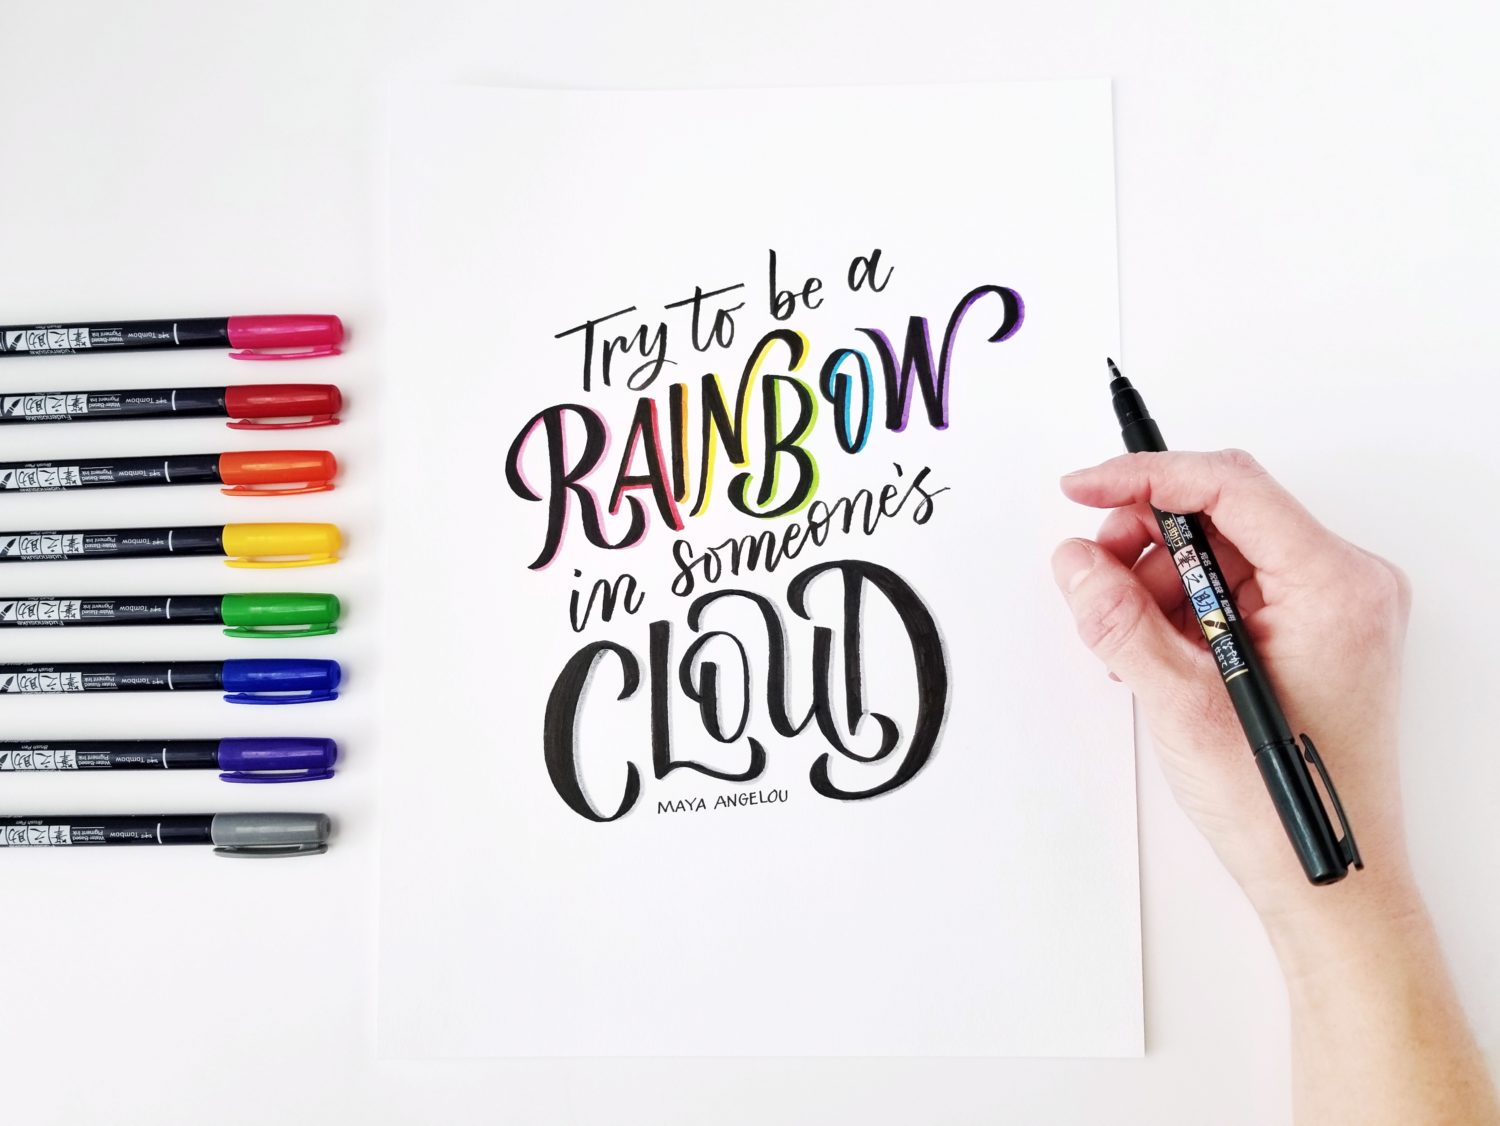
Today I want to share some hand lettering styles to use in your bullet journal. I love decorating my bullet journal with hand lettering. I find it a great way to practise my hand lettering as well as something fun to look at. I’ve tried to come up with some styles of hand lettering rather than specific fonts. I think this should give you far more flexibility with how you choose to letter in your bullet journal. But first I just want to share some info on my favourite art supplies and a wee typography lesson which will help you get better at hand lettering. 5 Hand Lettering Styles For Your Bullet Journal Supplies I would highly recommend you don’t go out and buy art supplies just for hand lettering in your bullet journal. I tend to work with what I have. But I’ve put together a list of the types of art supplies you could use. A pen and pencil will be your first must-have items. The exact brand of each will mostly just depend on what you have. I have some Blackwing pencils which I like for drawing, but I also have a few regular mechanical pencils that work just as well. When it comes to pens I prefer a gel pen, but fineliners are a great alternative. I tend to buy the Staedtler fineliners, but don’t use them all that much. Markers are a great way to add colour. I like the Tombow Dual Brush markers if I’m writing straight onto notebook paper. But I’ll also use paint markers if I’m writing on top of magazines or other bits I’ve collaged together. Posca Markers are a great option and they come in a huge variety of colours. I also like the Molotow paint pens but I’d highly recommend not buying these just for your bullet journal. They can be quite expensive and are made for drawing on wood or plastic rather than notebook paper. This is maybe a little bit more specialised but I love using my calligraphy tools when hand lettering in my notebook. If you’re wanting a classic copperplate look the Nikko G nibs are a great beginners tool. I also really like using the Speedball B series nibs to get a monoline style lettering. However, I need to highlight you don’t *have* to buy this type of nib, you can achieve the same style of lettering using a regular marker pen with a bullet tip. In this post, I’m working in a Leuchtturn1917 notebook so you can assume these supplies should work in that notebook. However, I’d always recommend you test any art supplies first just to make sure there are no weird issues with the paper in your notebook. A small typography lesson Hand lettering has come to be known as the art of drawing letters. This gets a little complicated when you go further back because calligraphy and lettering were the same thing. We now tend to use both terms as distinct things. But for the sake of this post when I refer to lettering I am talking about drawing letters no matter the style. There are a few small tips you can learn to help keep your lettering consistent. If you are writing in all capital letters, your letters should all be the same height. If you’re working in a grid or dot grid notebook this will be easy for you because you can use the grid to keep everything in order. Lower case letters get a little trickier. In graphic design, we have what is known as the x-height. The x-height is the height of the letters without an ascender or descender. So a, n, m, o etc. Your ascender and descender letters are those which go above and below this x-height. So b, d, p, q etc. Once you’ve decided on your x-height, you can then define the height of your ascender and descender lines. This could be one or two times your x-height. The important part of this is that you should be consistent with your letters. All your descenders need to hit the same point. This helps with legibility but also makes your lettering look the same. Now the fun bit comes when you play with these rules. You could have a really big x-height and a really small ascender/ descender. Or you could do the opposite and have a small x-height with long descenders. This is what will give your lettering character. Try playing around with these rules, it’s always fun to see what you can come up with. Now that you’ve got the basics, I’m going to show some hand lettering styles that you could try. Print letters Print is probably the style of handwriting you learned as a kid and is also very fun to play around with when hand lettering in your bullet journal. I have a whole post on how to improve your handwriting, but for this specific post, we’re going to assume you want to do something a little more special. One of the first things you’ll want to do is make sure you’re following those rules about the x-height. If you want to make your print letters neat you can draw them in pencil before going back over in pen. You also have many options when it comes to adding character to your letters. One of the most obvious is changing your x-height. I like working in a very large x-height and small ascender space. You can also play around with how wide your letters are. Print is based on a style of calligraphy created by Edward Johnston called Foundational. This calligraphy style was inspired by illuminated manuscripts and most of the letters are based on a square shape. So think of your o and c as being a circle that fits inside a square. The other letters are then based on this width. However, your print letters don’t need to be this wide. Using thin characters will give your lettering a very different look. The type of pen you use for your letters will also change how they look. A thin fine liner and a thick bullet nib will make the same letter look very different. I like using the Speedball B series nibs with this specific style of lettering however the bullet tip on the Tombow markers are a great alternative. Serif Capitals Once you’ve mastered your regular print letters it’s really easy to change them into serif letters. For those of you without a design background, serifs are the little flicky bits on older style letters. If you’re going for a monoline style it’s really easy to just give your letters feet to create that serif look. This particular style is great if you’re wanting to create some typewriter style lettering. If you want true serifs on your letters its easier to draw them in with a pencil first, adding the feet and then rounding out the corner. It is also possible to use a broad edge nib, or the Pilot Parallel pen to create serif letters. This is the reason why we have serif letters in the first place. Those little flicks are what happens when you draw letters with a broad edge. However, this is a more complicated form of lettering and requires a good deal of practice as it involves twisting the pen as you draw. Cursive Cursive (or joined-up writing) is a really popular hand lettering style to use in your bullet journal. I love doing calligraphy (I also work as a calligrapher) and so this is probably one of my favourite ways to add lettering into my bullet journal. One thing I love is that you don’t have to be good at calligraphy to do this style. Even just a fancier version of your regular joined-up writing can look good if done in the right way. I usually use a monoline style of calligraphy, but if you have brush pens or a dip pen these will work well. You may want to be careful if using a dip pen. Writing straight on notebook paper should be fine. But I like to collage in my bullet journal and the dip pen doesn’t work on magazine paper. If you’re not at the point of doing proper calligraphy yet, I mention faux calligraphy further down this post which is a really easy alternative. Block Capitals Block capitals are probably one of the easiest hand lettering styles. You can use the dot grid as the basis for your lettering. When you are drawing block capitals you’ll first want to set the top and bottom of your letter, from there you’ll want to set a mid-line, this is where the crossbar of the A, and H will sit. It’s also where the middle of your B will sit. This middle line can be exactly halfway between the top and bottom of your letter, but you can experiment with changing this to give your letters a different look. Once you’ve got the skeleton of your alphabet drawn out, you could leave it as is. Or you can make this line thicker to give it a true block capital look. From there you can go on to add colour or other embellishments. You can also try adding a drop shadow to your letters, again, the grid paper will make it easy to create a 45-degree drop shadow. The fun part of block capitals is there are so many variations. It can be fun to try combining different styles to create a truly unique look. I don’t use a huge amount of lettering in my bullet journal. But I like this specific style when I’m starting a new year in my bullet journal. Faux Calligraphy If you’re not quite ready to start doing calligraphy with a dip nib, faux calligraphy can be a great alternative way to use hand lettering in your bullet journal. Faux calligraphy was actually how I got started with lettering. Hopefully, the image explains how to do faux calligraphy better than this. But essentially what you want to do is write in a cursive style with a pen or pencil. From there you’ll want to make the downstroke lines thicker. This will mimic the effect of writing with a dip nib where the tines of the nib expand on downstrokes. Again, following those same rules when it comes to the x-height and keeping all your letters the same size. You can go on to experiment with your calligraphy and add more flourishes. You can also try a more modern calligraphy style where your lines have more bounce to them. Finally And there we have 5 hand lettering styles. I’ve tried to focus on ways you could do hand lettering rather than show specific scripts. I find that experimenting with lettering can be great fun and its always better to create something which is uniquely yours. Happy lettering!
Why the Bullet Journal Works: It Soothes Your Panicky Mind -- Science of Us
The Best Bullet Journal Fonts For Your Bujo Pages - Angela Giles
23 Bullet Journal Fonts You Need To Try Today

5 Hand Lettering Styles For Your Bullet Journal - the paper kind

Bullet Journal Fonts - Wellella - A Blog About Bullet Journaling
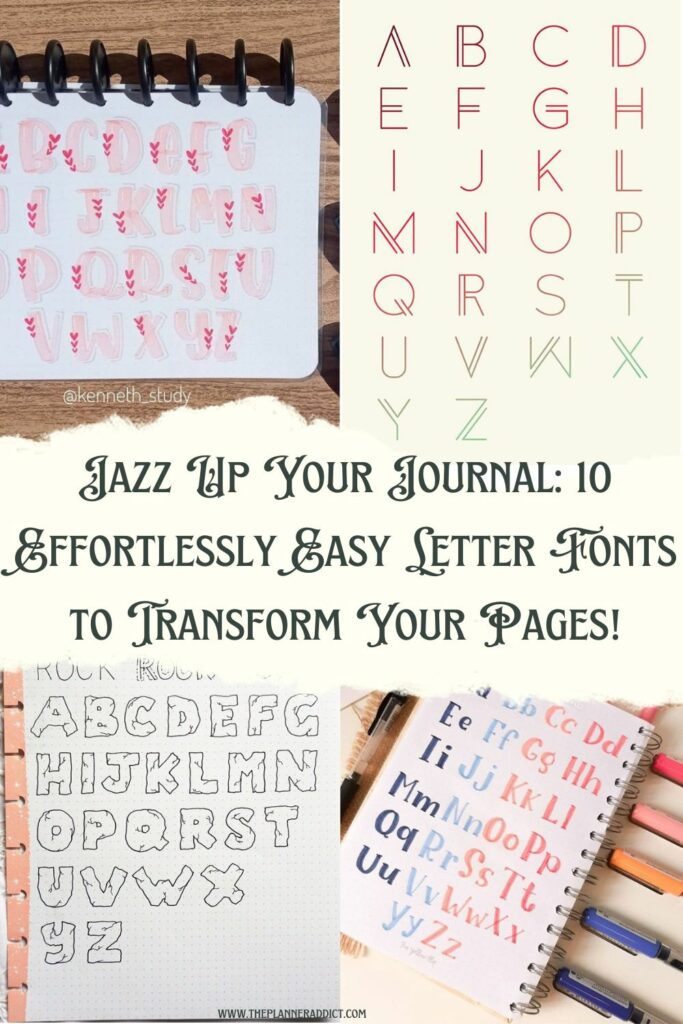
Jazz Up Your Journal: 10 Effortlessly Easy Letter Fonts to Transform Your Pages! - The Planner Addict

Hand Lettering Ideas For Your Bullet Journal
Five Ways to Use a Dot Grid Journal

5 Hand Lettering Styles For Your Bullet Journal - the paper kind

5 Hand Lettering Styles For Your Bullet Journal - the paper kind
Recommended for you
-
 10 Super Easy Hand Lettering Techniques with an Artful Spin12 May 2024
 -
 Hand Lettering Instructions and Tips12 May 2024
 -
 Hand-Lettering Lessons: Super Easy Modern Calligraphy + Print with Traceable Alphabets: Bryan, Caroline: 9781250271303: : Books12 May 2024
 -
 Learn Hand Lettering, the Charming Art of Custom Letterforms12 May 2024
 -
 5 P's of Brush Calligraphy and Hand Lettering - Tombow USA Blog12 May 2024
 -
 Black White Hand Lettering Alphabet Design Stock Illustration 52233088312 May 2024
 -
 30 DAYS AWAY: Hand Lettering for Laughter - Amy Latta Creations12 May 2024
 -
 Self-Made Society: Hand-Lettering For Beginners — Made Vibrant12 May 2024
 -
 Hand Lettering Practice Sheets 10 Ways to Hand Letter the Alphabet Lowercase Learn Brush Calligraphy12 May 2024
 -
 How to Love your Hand Lettering (Free Lettering Practice Worksheets)12 May 2024
You may also like
-
 Smart Color Art 140 Colors Gel Pens Set Gel Pen for Adult Coloring Books Drawing Painting Writing12 May 2024
 -
 Lana Del Rey Stickers, Lana Del Rey Fanart Stickers, Lana Del Rey 2023 Stickers sold by Clau Souza, SKU 4093998312 May 2024
 -
 Wholesale MARBLING PAINT - 12 COLOURS CRAFT KIT - Eleganter Australia Pty Ltd - Fieldfolio12 May 2024
 -
 Lavender Essential Oil (French)12 May 2024
 -
 NABEIM Collapsible Bucket with Handle, 2 Pack Portable Folding Bucket, Portable Fishing Water Pail, Outdoor Basin Pail for Garden, Camping, Hiking12 May 2024
 -
 Rounded Rectangle Stack Pack (3 Piece)12 May 2024
 -
 CONAIRPROPET Dog Rounded-Tip Shears, 6-in12 May 2024
 -
Luxury Anniversary Gift Guide12 May 2024
-
 Absolute beginner looking to get into silversmithing : r/SilverSmith12 May 2024
 -
![Double Face Satin Ribbon, Black, 1/16 inch (2 mm) [2151-030-68] - $3.48 : Holiday Manufacturing Inc, Holiday Bows](https://www.holidaybows.com/images/2151-030-68.jpg) Double Face Satin Ribbon, Black, 1/16 inch (2 mm) [2151-030-68] - $3.48 : Holiday Manufacturing Inc, Holiday Bows12 May 2024
Double Face Satin Ribbon, Black, 1/16 inch (2 mm) [2151-030-68] - $3.48 : Holiday Manufacturing Inc, Holiday Bows12 May 2024