How to Determine the Optimal Speed and Power Settings for Different Ma – WIZMAKER
By A Mystery Man Writer
Last updated 26 May 2024
When using a laser engraving machine for engraving and cutting, we often struggle to find the right parameters. Inappropriate settings can result in unclear engraving patterns, excessive charring, difficulty cutting through materials, and ultimately lead to significant material and time wastage in completing our projec
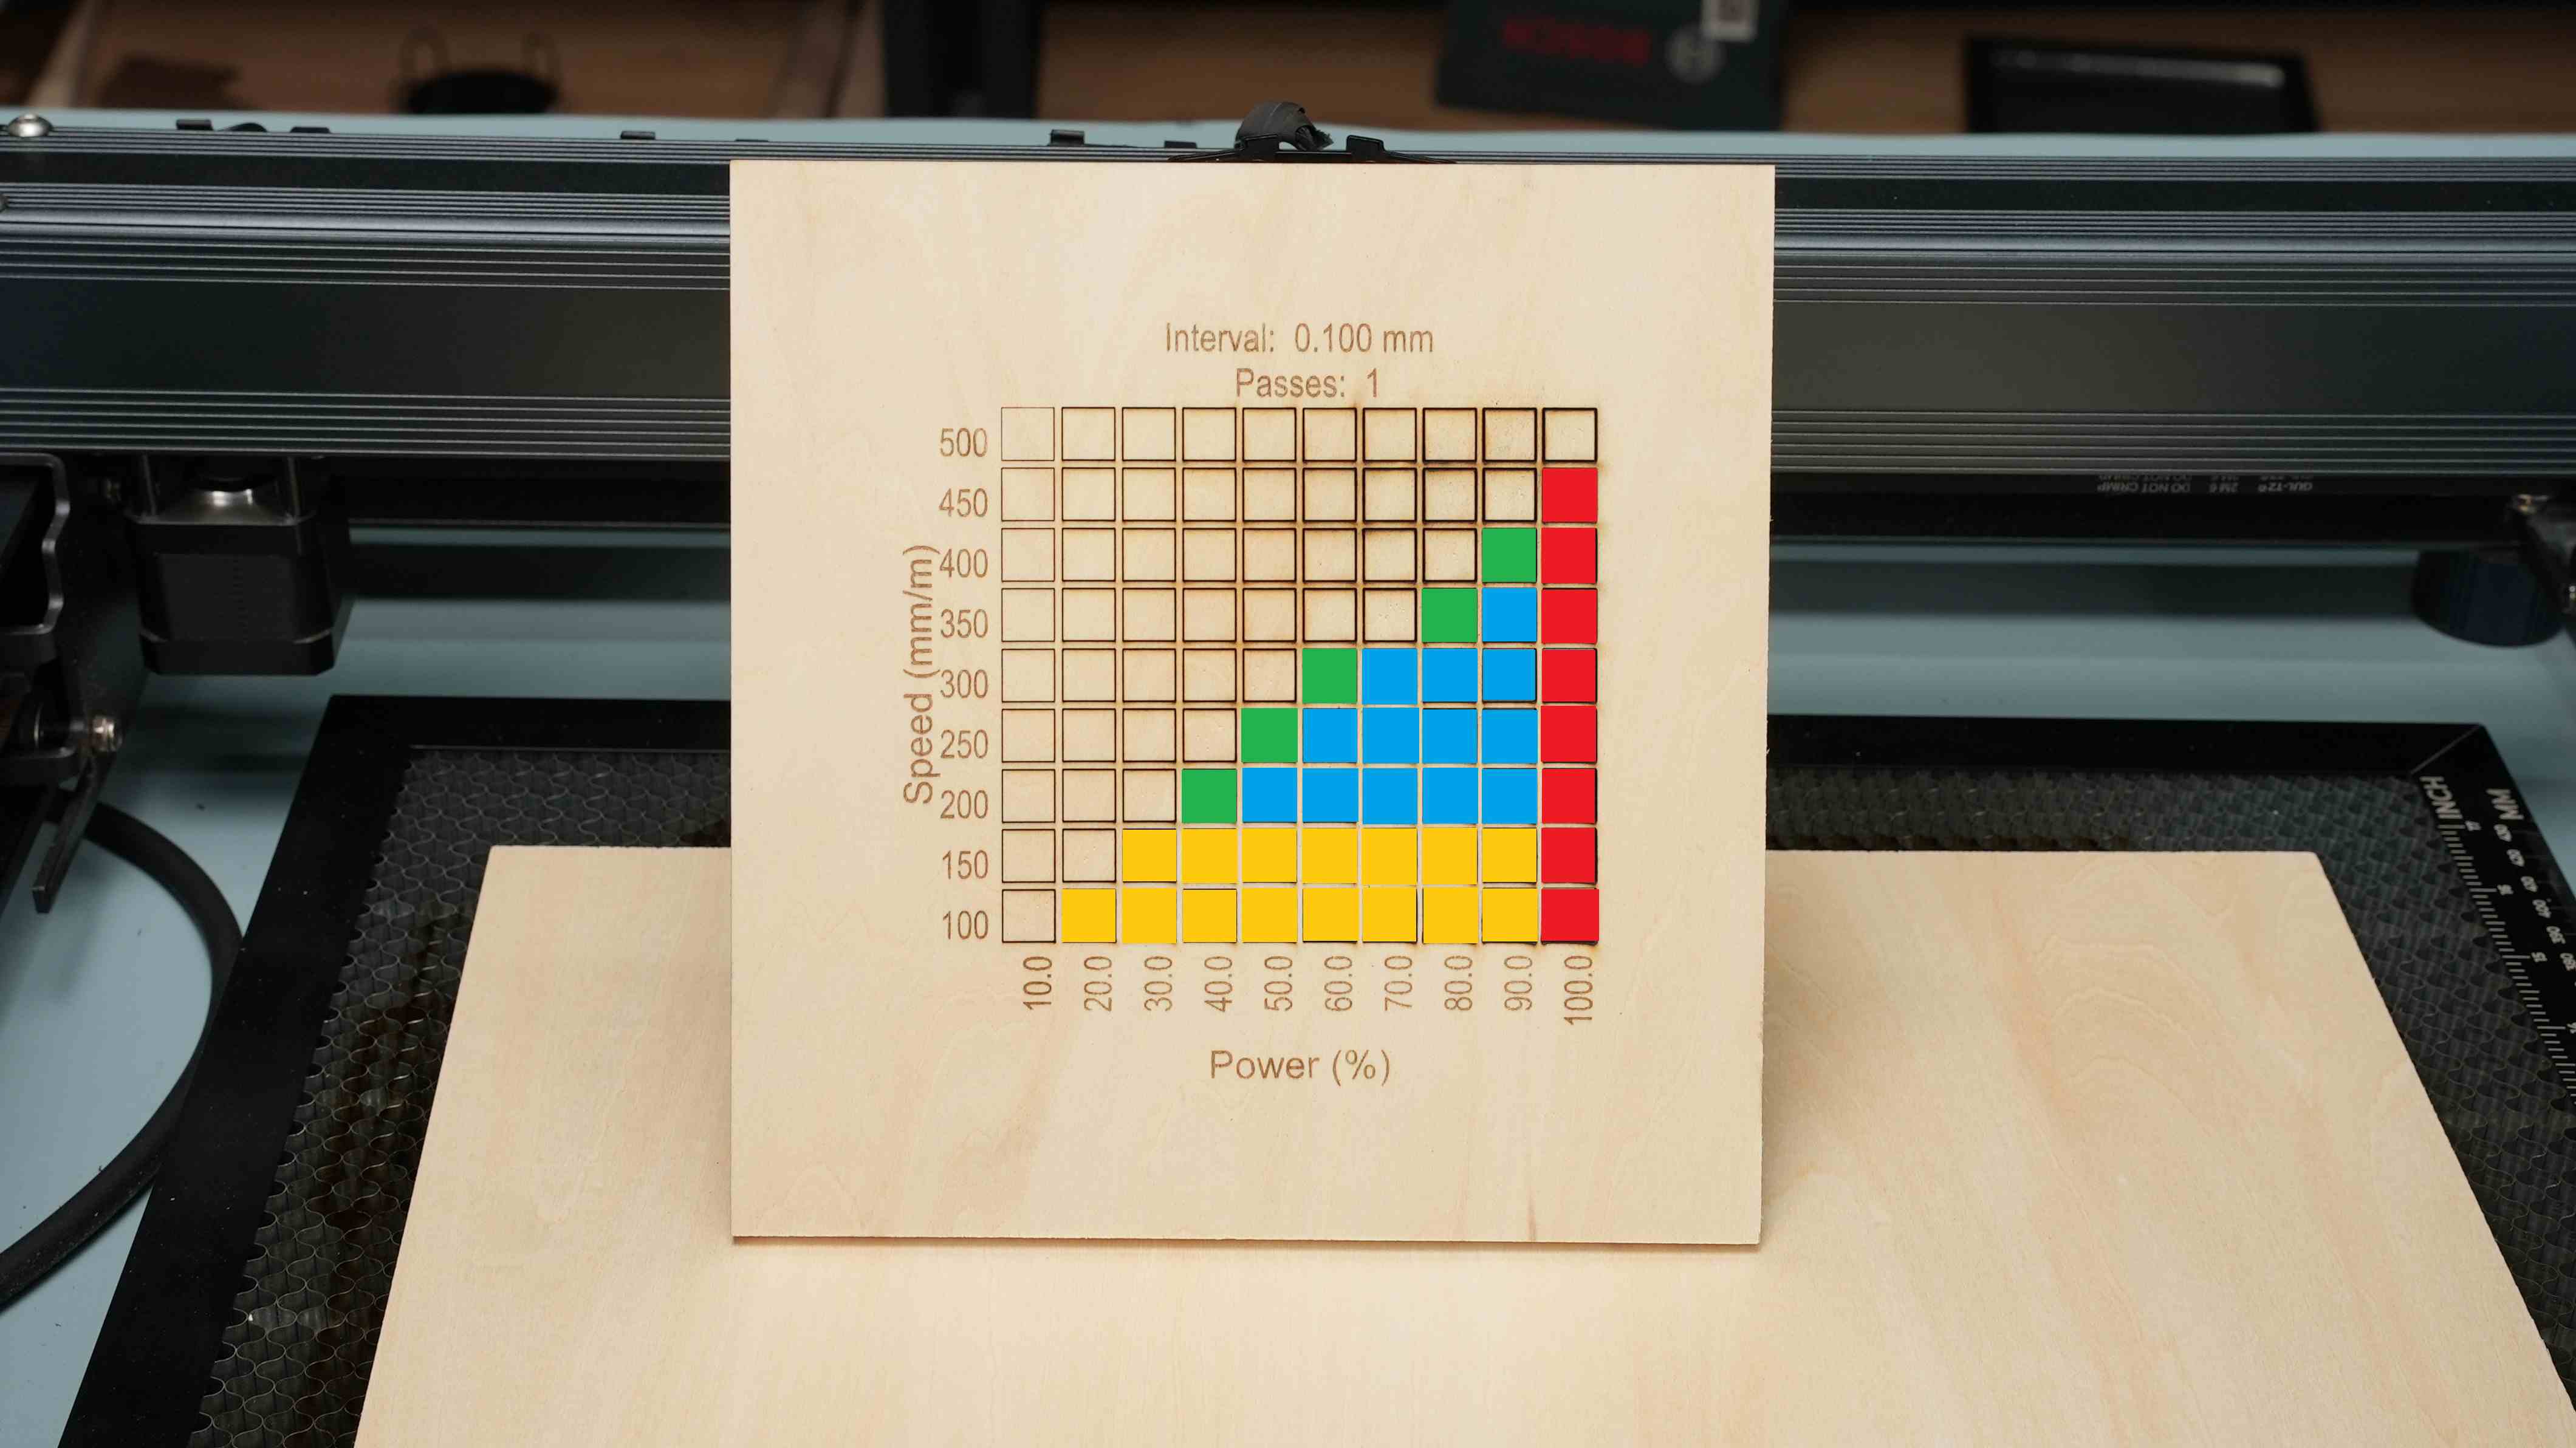
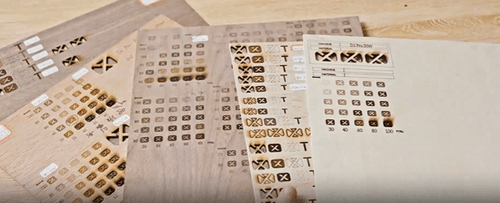
When using a laser engraving machine for engraving and cutting, we often struggle to find the right parameters. Inappropriate settings can result in unclear engraving patterns, excessive charring, difficulty cutting through materials, and ultimately lead to significant material and time wastage in completing our projects.Based on this, it's essential to conduct a preliminary test when performing cutting or engraving to identify the most suitable parameters – the perfect combination of speed and power. Below, I'll explain the steps to find the optimal settings.Firstly, Lightburn provides a straightforward feature to assist us. So, open Lightburn and navigate to the Lightburn interface. Click on Material Test under Laser Tools (Image 1). (Image 1) Next, you will enter the Material Test Generator interface (as shown in Image 2). Here, you can configure the parameters you want to test. Since our goal is to determine the appropriate speed and power for engraving or cutting, select Speed for the parameter in the Vertical/Rows section and Power for the parameter in the Horizontal/Columns section. (Image 2) If you want to test different cutting effects with speed ranging from 200mm/min to 2000mm/min and power varying from 10% to 100%, you should enter the following values (Image 3):In the Vertical/Rows section:Min: 200mm/minMax: 2000mm/minIn the Horizontal/Columns section:Min: 10%Max: 100% (Image 3) Since we aim to test cutting effects, you need to click on Edit Material Settings (Image 4) and select Line under Mode (Image 5). However, if you wish to test engraving effects, you should choose Fill under Mode. (Image 4) (Image 5) Afterward, click OK. Then, click Preview to examine the previewed results (Image 6) and verify if it's the test pattern you intend to use. (Image 6) Now, let's take the example of cutting a 5mm thick wooden board using a Wizmaker 36W laser engraving machine. We want to find the speed and power parameters suitable for cutting 5mm wood. In this case, we set the speed to range from 100mm/min to 500mm/min and the power from 10% to 100%, as shown in the image below(Image 7). (Image 7) We click Start Test, and the test results are as follows(Image 8):The red area represents No Good, indicating that the power is too high, causing the edges to char easily.The yellow area represents Speed Too Slow, indicating that the speed is too slow, which reduces efficiency in completing the work.The green area represents Too Borderline, where the cutting power and speed are close to the boundary values, making it prone to inconsistent cutting.The blue area represents Perfect, and this is the part where the speed and power settings are suitable and can be used as reference. (Image 8) Additionally, we have conducted a set of tests to determine the suitable power and speed for engraving. We used a Wizmaker 12W laser engraving machine for engraving on 3mm plywood. The speed was set to range from 500mm/min to 5000mm/min, and the power ranged from 10% to 100%, as specified below(Image 9): (Image 9) However, it's important to note that since we are conducting engraving tests, we need to click on Edit Material Settings and select Fill under Mode. After that, we initiate the test. After a 3-hour engraving test, we obtain our test results (Image 10). (Image 10) Because everyone has different requirements for engraving effects, the suitable power and speed will also vary. Based on the test results, you can choose the engraving effect you desire, thereby confirming the power and speed settings that match your preferences.
When using a laser engraving machine for engraving and cutting, we often struggle to find the right parameters. Inappropriate settings can result in unclear engraving patterns, excessive charring, difficulty cutting through materials, and ultimately lead to significant material and time wastage in completing our projects.Based on this, it's essential to conduct a preliminary test when performing cutting or engraving to identify the most suitable parameters – the perfect combination of speed and power. Below, I'll explain the steps to find the optimal settings.Firstly, Lightburn provides a straightforward feature to assist us. So, open Lightburn and navigate to the Lightburn interface. Click on Material Test under Laser Tools (Image 1). (Image 1) Next, you will enter the Material Test Generator interface (as shown in Image 2). Here, you can configure the parameters you want to test. Since our goal is to determine the appropriate speed and power for engraving or cutting, select Speed for the parameter in the Vertical/Rows section and Power for the parameter in the Horizontal/Columns section. (Image 2) If you want to test different cutting effects with speed ranging from 200mm/min to 2000mm/min and power varying from 10% to 100%, you should enter the following values (Image 3):In the Vertical/Rows section:Min: 200mm/minMax: 2000mm/minIn the Horizontal/Columns section:Min: 10%Max: 100% (Image 3) Since we aim to test cutting effects, you need to click on Edit Material Settings (Image 4) and select Line under Mode (Image 5). However, if you wish to test engraving effects, you should choose Fill under Mode. (Image 4) (Image 5) Afterward, click OK. Then, click Preview to examine the previewed results (Image 6) and verify if it's the test pattern you intend to use. (Image 6) Now, let's take the example of cutting a 5mm thick wooden board using a Wizmaker 36W laser engraving machine. We want to find the speed and power parameters suitable for cutting 5mm wood. In this case, we set the speed to range from 100mm/min to 500mm/min and the power from 10% to 100%, as shown in the image below(Image 7). (Image 7) We click Start Test, and the test results are as follows(Image 8):The red area represents No Good, indicating that the power is too high, causing the edges to char easily.The yellow area represents Speed Too Slow, indicating that the speed is too slow, which reduces efficiency in completing the work.The green area represents Too Borderline, where the cutting power and speed are close to the boundary values, making it prone to inconsistent cutting.The blue area represents Perfect, and this is the part where the speed and power settings are suitable and can be used as reference. (Image 8) Additionally, we have conducted a set of tests to determine the suitable power and speed for engraving. We used a Wizmaker 12W laser engraving machine for engraving on 3mm plywood. The speed was set to range from 500mm/min to 5000mm/min, and the power ranged from 10% to 100%, as specified below(Image 9): (Image 9) However, it's important to note that since we are conducting engraving tests, we need to click on Edit Material Settings and select Fill under Mode. After that, we initiate the test. After a 3-hour engraving test, we obtain our test results (Image 10). (Image 10) Because everyone has different requirements for engraving effects, the suitable power and speed will also vary. Based on the test results, you can choose the engraving effect you desire, thereby confirming the power and speed settings that match your preferences.
Can i save two rotarys and there setting (lightburn rotary setup test is different then frame test) - LightBurn Software Questions - LightBurn Software Forum

WIZMAKER L1 Laser Engraver, 24W Output Power Laser Cutter, High Accuracy Laser Engraving Machine, 120W Lazer Cutting Machine, Laser Engraver for Wood and Metal, Craft Paper, Acrylic, Leather, Red : Arts
Lightburn not powering laser correctly - GRBL - LightBurn Software Forum
Faster Speed & High AccuracyUpgraded 20-24W Laser module and 32 bit motherboard support faster cutting and engraving speed. Ultra-fine laser focus is
WIZMAKER L1 20W Laser Engraver Cutting Machine with Air Assist
Maxtor 7120AT jumper settings. Vintage Computer Federation Forums

Laser Engraving Speed Chart: What Are the Optimal Laser Settings? – OMTech Laser
FIXED SWITCHING MODE POWER SUPPLY 13.8 VDC / 20 A - Whadda

Tuning with Room EQ Wizard and Poweramp Eq for Android (Kia EV6 Meridian system) : r/CarAV
Tutorial: Speed and Power (What to Adjust and When)
Recommended for you
-
 LaserPecker 4: Dual-Laser Engraver for Almost All Material by LaserPecker — Kickstarter26 May 2024
 -
 Csyidio 175 PCS Engraving Material Box, DIY Materials Apply to All Laser Engravers with Instructions, Laser Engraving Supplies Including Acrylic26 May 2024
 -
 The Complete Laser Cutting Materials List - xTool26 May 2024
 -
 Material Sample Kit Request – Laser Jump Start26 May 2024
 -
 Laser Engraving Materials Gravograph becomes Gravotech26 May 2024
 -
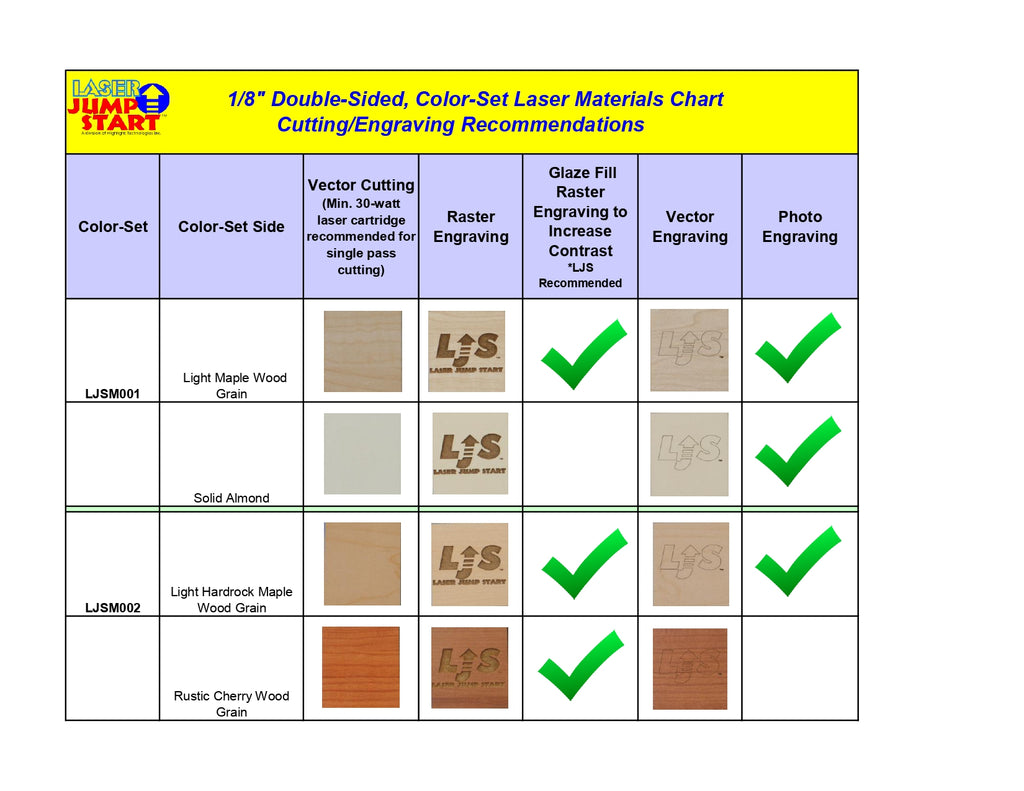
 Engraving material parameter table26 May 2024
 -
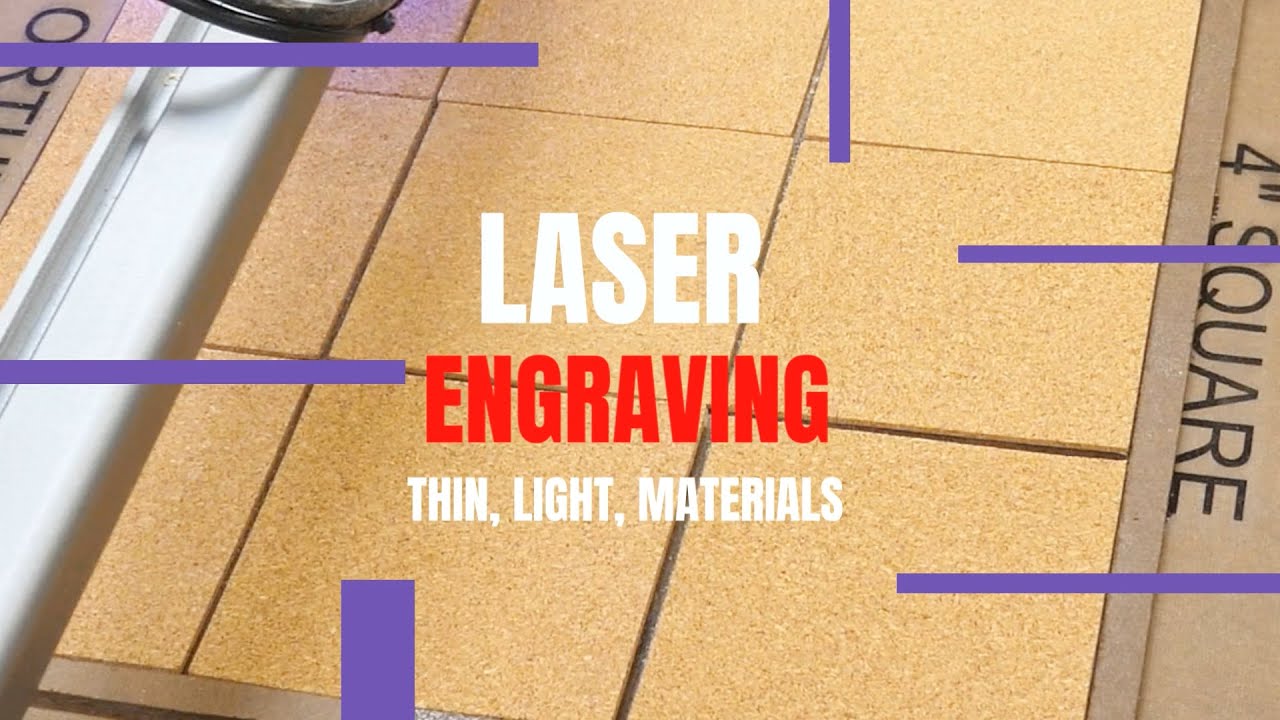 Laser Thin Materials Tips26 May 2024
 -
 Atomstack Laser Engraver Material Durable Natural Wood For A5/s1026 May 2024
 -
 Material Setting26 May 2024
 -
 Comgrow Laser Engraving Machine for Dog Tag Metal Wood26 May 2024
You may also like
-
 Printable Neat Handwriting Practice Sheets, iPad compatible, Neat Handwriting Practice, Neat penmanship workbook, Handwriting practice for adults kids26 May 2024
 -
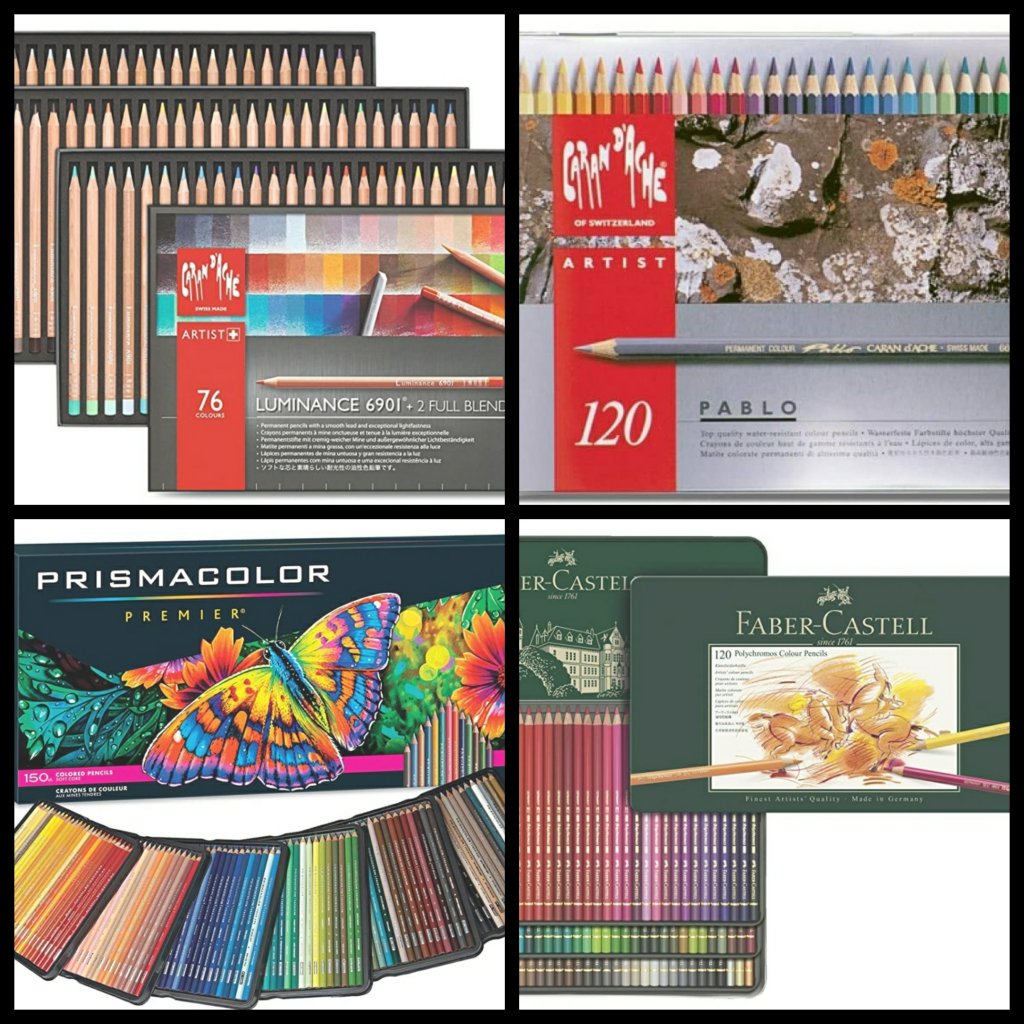 The Search for the Best Colored Pencil Paper: Part 1 of a Series26 May 2024
 -
 Extra Large Silicone Countertop Mat, Silicone Table Mat Kitchen Counter Protector Nonslip Heat Resistant Silicone Desk Mat For Crafts Kids Dinner Pla - Imported Products from USA - iBhejo26 May 2024
 -
 Edgy Embroidery Book - 0978162414441726 May 2024
 -
 Bead 14K Gold Heart Charm - 75011926 May 2024
 -
 Xin Bowen Nylon Brush Set Angled Round Tip Art Pen Brush - Temu26 May 2024
 -
 TOUGHBUILT Scraper Utility Knife 5 Blades TB-H4S5-01 for sale26 May 2024
 -
 Clear Shelf Support Pegs Cupboard Clips Holder Plastic Bookcase Self-Locking Pins for Kitchen Furniture Book Shelves - China Shelf Support, Hidden Shelf Support Bracket26 May 2024
 -
 Sharpie Permanent Markers, Ultra Fine Point, Black - 5 markers26 May 2024
 -
 March PreMade Bullet Dotted Journal Planner Pages | Instant Download Printable Planner | Weekly Bujo Inserts Template PDF 2 Sizes26 May 2024